Preparedness Challenge Week 39
This week the preparedness challenge is to add apples to your food storage. Apples are nutritious and tasty and are fresh and plentiful this time of year. They are one of the most economical fruits, and almost everyone likes them.

Apples are good for snacks, salads, cakes, muffins, breads, apple pies or crisps, and to enhance meat dishes. Having a supply of apples will increase menu options if you must rely on your stored food. For this week’s challenge choose one of the options for adding apples to your food storage.
This week’s challenge: Add apples to your food storage.
PREPAREDNESS CHALLENGE OPTION #1
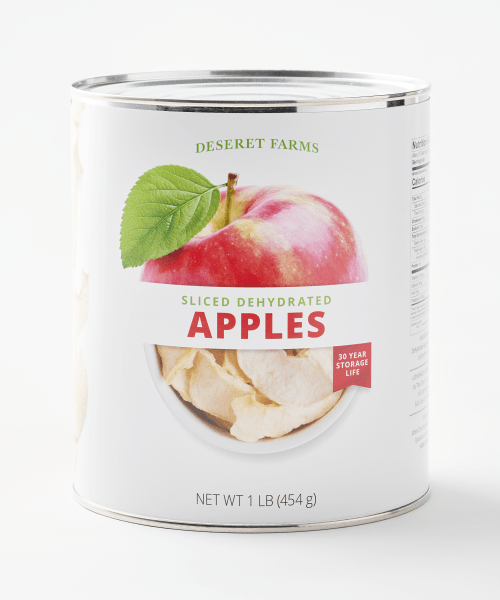
The simplest option is to purchase several #10 cans of dehydrated apples. The apples are already prepared and ready to store. This option is economical and the storage life is 25 years or more. Start by purchasing one can for each member of your family.
PREPAREDNESS CHALLENGE OPTION #2
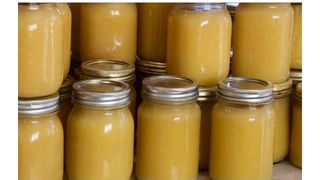
Store applesauce, either commercially produced or homemade. Store thirty servings for each family member. This will be enough for one serving a day for a month, one serving every other day for two months, etc. A quart jar has eight half-cup servings which means you would need four one-quart jars per family member to equal about thirty servings. A total of 120 ounces equals thirty servings.
PREPAREDNESS CHALLENGE OPTION #3
Store a bushel of fresh apples when they are in season and economical. Store them in a cool location, just above freezing. They do not have a long shelf-life, but will be a bonus to a winter diet. Properly stored apples will last six months or so.
Tips for Drying Apples
DEHYDRATED APPLES

As mentioned, you can purchase dehydrated apples, but they may not be made from premium-quality apples. But apples are one of the easiest foods to dehydrate at home and you determine the quality control. To simplify the process, use an apple peeler that both peels and slices in one operation. A lemon or citric-acid wash is sometimes recommended before placing apples slices in the dehydrator, but I find that unnecessary.
FREEZE-DRIED APPLES
Freeze drying is an excellent way to preserve apples. Freeze-dried apples are delicious and very light in texture—they almost melt in your mouth. The downside is that commercially freeze-dried apples are cost more than dehydrated apples, and a home freeze dryer is very expensive but might be worth the investment if you can use it multiple ways and perhaps share the cost of one with friends and family.
HOW TO SELECT APPLES FOR DRYING
Select firm, ripe apples. Soft apples are hard to peel and slice and do not dehydrate well. I prefer to use medium to large apples and save the smaller ones for applesauce. Both sweet and tart apples can be dehydrated—it’s a personal preference. We like to dehydrate both sweet Golden Delicious and tarter Fuji.
Don’t worry too much about the variety—use whatever you have available. We have successfully dehydrated quite a few different varieties—Jonathon, Winter Banana, Red Gold, and even Red Delicious, and they all turn out great.
Preparing Apples for Dehydrating
The only preparation needed is washing the apples and removing the stems. Some people like the rustic look of apples that are dried with their skin and core still intact. I prefer to peel, core, and slice apples uniformly with an apple peeler. I have experimented with both refrigerated and room-temperature apples, and those at room-temperature seem to work best in an apple peeler.
INVEST IN AN APPLE PEELER

If you don’t own an apple peeler, you may want to investment in one. They can be used to peel, core, and slice or to just peel. Besides being used for preparing apples for dehydrating, it can be used to peel apples for apple pie or apple crisp and to peel potatoes for making homemade French fries or to boil potatoes for a big family dinner.
SHOULD APPLES BE TREATED FOR DEHYDRATING?
Some recommend soaking apples in a lemon/water or a vinegar/water solution. We do not treat our apples but put them on the dehydrator trays as soon as they are sliced and begin drying them immediately. Our apples end up light in color. It works best if two people work together, one peeling and slicing, and one laying the slices out on the dehydrator trays.
Using a Dehydrator to Dry Apples
Cut the apple slices in half and arrange them on the dehydrator trays, slightly overlapping the pieces so more can fit. Overlapping also keeps the slices slightly elevated and separated so you shouldn’t have any problems with the slices sticking to each other or to the tray. Set the dehydrator at 135° F and dry the apples from eight to ten hours until they are pliable and chewy. If they dry too long they will end up as crisp apple chips. Feel free to experiment to find the ideal time and temperature.
HOW TO CONDITION DEHYDRATED APPLES
Apple slices do not dry evenly. To even out the moisture, place all the apples from the batch in a large sealable container or in a gallon-size resealable bag. Leave them for a few days and the moisture will spread evenly throughout the batch.
What is the Shelf Life for Dehydrated Apples?
Commercially-produced apple slices packaged in #10 cans with oxygen absorbers have a shelf of 25 years if stored in a cool place. Similarly, apples dehydrated at home and sealed in mylar bags with oxygen absorbers also have a shelf life of 25 years. We don’t worry about shelf life because our dried apples are eaten so quickly! Our goal is to dry a year’s supply every fall when apples are in season and enjoy them throughout the year, but so far, our apple stash has never made it that long.
Ideas for Adding Canned Apples to Your Storage
Applesauce is versatile, can be inexpensive, and nice to use in baked goods and as a condiment, as well as for eating. For convenience, purchase commercially canned applesauce in jars or cans. Canned applesauce has a shelf life of about three years when stored in a cool, dark location.
Make Your Own Applesauce
If you have a plentiful source for fresh apples, you might want to make your own apple sauce. Many apples make delicious applesauce—I prefer to use a mix of different types of apples, and I find that apples are sweet enough that I don’t need to add sugar.
THE MOST EFFICIENT WAY TO MAKE HOMEMADE APPLESAUCE:

- Wash apples, remove stems, cut apples in quarters, and remove any spots—no need to peel or core.
- Fill a large sauce pot with apple quarters.
- Add about a half-inch of water.
- Bring to a boil, and reduce to a simmer.
- Stir frequently to prevent scorching the apples.
- When apples are soft, run them through a Victorio-Strainer-style food mill.
- Blend and heat applesauce to a nice simmer, stirring frequently.
- Ladle into jars and process in a water bath or steam canner.
HOW TO MAKE CHUNKY APPLESAUCE:
Chunky applesauce is one of my favorites. It takes more time to prepare, but it is delicious on whole wheat pancakes, as an accompaniment to porkchops, served warm with a little cream, or as a topping on ice cream. Here’s how I do it:
- Wash, peel, and core apples.
- Cut apples into quarters and then cut each quarter into two or three chunks.
- Fill a large sauce pot with apple chunks.
- Add about a half-inch of water.
- Bring to a boil, and reduce to a simmer.
- Stir frequently to prevent scorching the apples.
Canned apple-pie filling, apple butter, and canned apple juice are also canned options. They may be commercially prepared or home canned.
Tips for Storing Fresh Apples
Store fresh apples in a cool, dark place. The secret to keeping apples crisp and fresh is to store them just above freezing, in a slightly humid condition. They will keep six or more months if stored properly.
Learn More

If you are wanting more resources about dehydrating and preserving food or other areas of preparedness and Home Storage and Preparedness, check out my book Crisis Preparedness Handbook available on my website, CrisisPreparedness.com and on Amazon.


